 CSS
CSS
# CSS
# CSS简介
从HTML被发明开始,样式就以各种形式存在。不同的浏览器结合它们各自的样式语言为用户提供页面效果的控制。最初的HTML只包含很少的显示属性。 随着HTML的成长,为了满足页面设计者的要求,HTML添加了很多显示功能。但是随着这些功能的增加,HTML变的越来越杂乱,而且HTML页面也越来越臃肿。于是CSS便诞生了。
那么如何实现结构和样式的完全分离呢?
# 什么是CSS
简单来说,层叠样式表(Cascading Style Sheet)是一种专门用来控制界面外观风格的文档。 主要用于设置HTML页面中的文本内容(字体、大小、对齐方式等)、图片的外形(宽高、边框样式、边距等)以及版面的布局等外观显示样式。
CSS以HTML为基础,提供了丰富的功能,如字体、颜色、背景的控制及整体排版等,而且还可以针对不同的浏览器设置不同的样式。
# CSS发展历史
- 1996年 CSS 1.0 规范面世,其中加入了字体、样色等相关属性。
- 1998年 CSS 2.0 规范推出,这个版本的 CSS 也是最广为人知的一个版本。
- 2004年 CSS 2.1 规范推出,对 CSS 2.0 进行了一些小范围的修改,删除了一些浏览器支持不成熟的属性。
- 2010年 CSS 3.0 规范推出,将 CSS3 分成了不同的模块,例如盒子模型、背景和边框、文字特效等模块。
# CSS使用方式(3种)
# 行内样式
<!DOCTYPE html>
<html lang="en">
    <head>
        <title>This is title</title>
    </head>
    <body>
        <p style="font-size: 16px; color: red;">大家好</p>
    </body>
</html>
2
3
4
5
6
7
8
9
行内样式需要写到标签的 style 属性值中。
# 内部样式表
<!DOCTYPE html>
<html lang="en">
    <head>
        <title>This is title</title>
        <style>
            p {
                font-size: 16px;
                color: red;
            }
        </style>
    </head>
    <body>
        <p>Hello everyone</p>
    </body>
</html>
2
3
4
5
6
7
8
9
10
11
12
13
14
15
内部样式需要写到
<style>标签中。
# 外部样式表
- 链接式
将样式写到单独的文件中,文件的扩展名为 .css。例如,index.css 文件中有如下样式:
p {
    font-size: 16px;
    color: red;
}
2
3
4
然后通过 <link> 元素将 index.css 文件引入到页面中:
<!DOCTYPE html>
<html lang="en">
    <head>
        <title>This is title</title>
        <link rel="stylesheet" type="text/css" href="./css/index.css">
    </head>
    <body>
        <p>我是优秀的开发工程师</p>
    </body>
</html>
2
3
4
5
6
7
8
9
10
<!DOCTYPE html>
<html lang="en">
<head>
<meta charset="UTF-8">
<meta http-equiv="X-UA-Compatible" content="IE=edge">
<meta name="viewport" content="width=device-width, initial-scale=1.0">
<title>Document</title>
<style>
/* 内部样式表 */
p{
/* 字体颜色的属性 */
color:red;
/* 字体大小 */
font-size: 30px;
}
</style>
<!-- 外部css -->
<!-- 引入css样式 -->
<link rel="stylesheet" href="../CSS/Test.css">
</head>
<body>
<!-- 行内样式表 -->
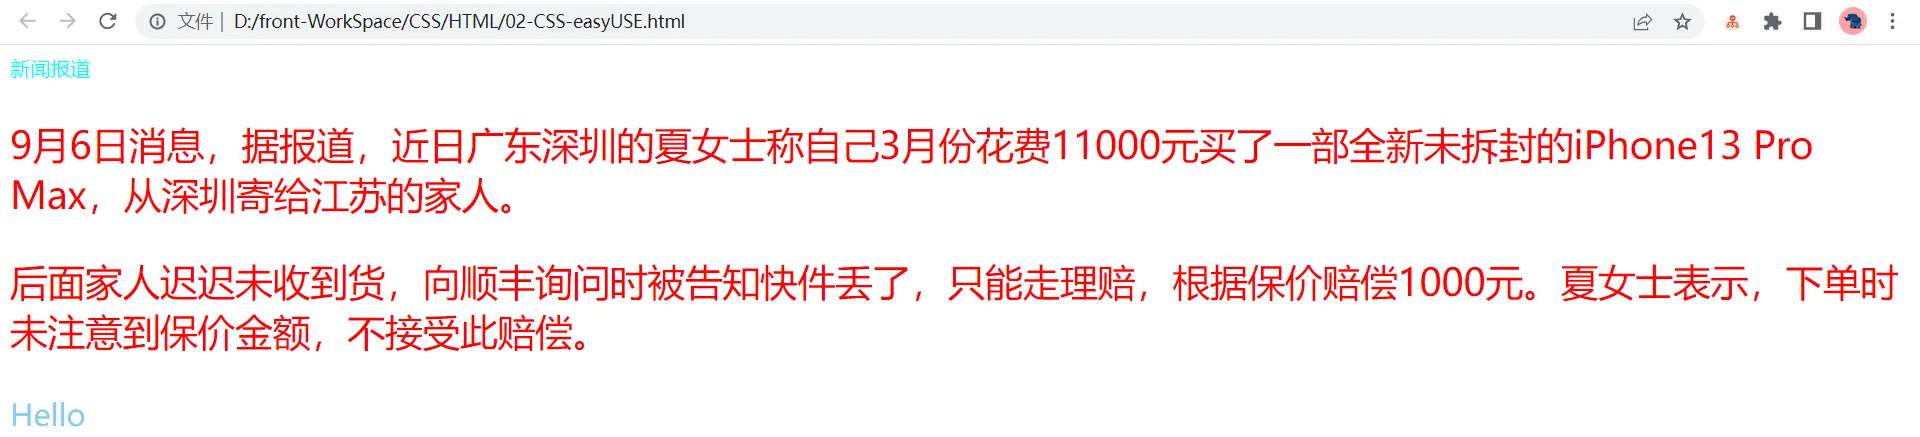
<div style="color:aqua">新闻报道</div>
<p>
9月6日消息,据报道,近日广东深圳的夏女士称自己3月份花费11000元买了一部全新未拆封的iPhone13 Pro Max,从深圳寄给江苏的家人。
</p>
<p>
后面家人迟迟未收到货,向顺丰询问时被告知快件丢了,只能走理赔,根据保价赔偿1000元。夏女士表示,下单时未注意到保价金额,不接受此赔偿。
</p>
<span>Hello</span>
</body>
</html>
2
3
4
5
6
7
8
9
10
11
12
13
14
15
16
17
18
19
20
21
22
23
24
25
26
27
28
29
30
31
32
33
span{
    color: skyblue;
    font-size: 24px;
}
2
3
4
- 结果
# css使用方式总结
- 定义在外部文件(外链样式):开发中主要是通过这种形式定义样式。(推荐)
- 在页面的头部定义(内联样式):通过这种形式定义的样式只在本页面内生效。
- 定义在特定的元素身上(行内样式):这种形式多用于测试,可维护性较差。(不推荐)
# CSS基本语法
CSS 样式由一系列的规则集组成,规则集中有一条或多条样式声明。
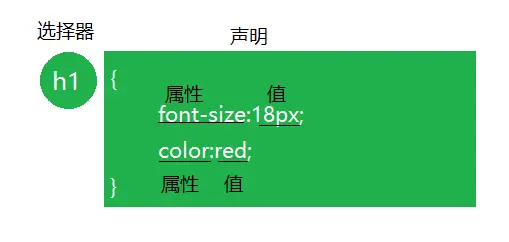
- 选择器通常是您需要改变样式的 HTML 元素。
- 每条样式声明包含着一对属性名和属性值。
- 属性名和属性值之间以冒号(
:)隔开。 - 样式规则之间以分号(
;)隔开。
# CSS字体样式属性
# font-size:字号大小
font-size属性用于设置字号。推荐使用像素单位px。
# px
- px单位名称为像素,像素是固定大小的单元,用于屏幕媒体(即在电脑屏幕上读取)。
- 一个像素等于电脑屏幕上的一个点 (是你屏幕分辨率的最小分割)。
- 大多数浏览器的默认字体大小是16px。
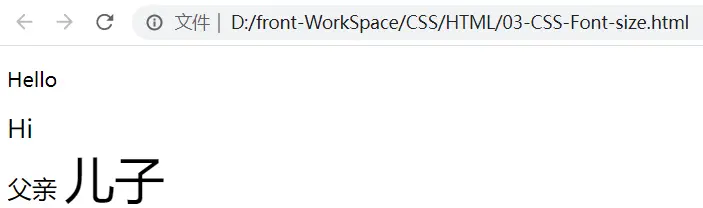
# em
em是相对字体长度单位。如果用于font-size属性本身,则是相对于父元素的font-size。
em单位有如下特点:
- em的值并不是固定的;
- em会继承父级元素的字体大小。
<!DOCTYPE html>
<html lang="en">
<head>
    <meta charset="UTF-8">
    <meta http-equiv="X-UA-Compatible" content="IE=edge">
    <meta name="viewport" content="width=device-width, initial-scale=1.0">
    <title>Document</title>
    <style>
    div {
        font-size: 20px;
    }
    span {
        font-size: 2em;
    }
    </style>
</head>
<body>
    <p>Hello</p>
    <div>Hi</div>
    <!-- 1.px:像素
         2.浏览器默认是16px
         3.浏览器识别最小字体是12px -->

    <!-- em尺寸,相对于父元素来说
         2em是父亲元素字体尺寸的2倍
         没设父级字体大小,默认16px -->
    <div>
        父亲
        <span>
            儿子
        </span>
    </div>
</body>
</html>
2
3
4
5
6
7
8
9
10
11
12
13
14
15
16
17
18
19
20
21
22
23
24
25
26
27
28
29
30
31
32
33
34
- 结果
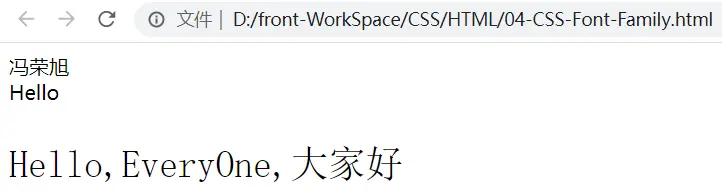
# font-family:字体
font-family属性用于设置字体。网页中常用的字体有宋体、微软雅黑、黑体等,例如将网页中所有段落文本的字体设置为微软雅黑,可以使用如下CSS样式代码:
p{
    font-family:"Arial","微软雅黑";
}
2
3
可以同时指定多个字体,中间以逗号隔开,表示如果浏览器不支持第一个字体,则会尝试下一个,直到找到合适的字体。
注意
- 现在网页中普遍使用16px、字体是微软雅黑。
- 各种字体之间必须使用英文状态下的逗号隔开。
- 如果字体名中包含空格、#、$等符号,则该字体必须加英文状态下的单引号或双引号,例如font-family: "Times New Roman";。
- 尽量使用系统默认字体,保证在任何用户的浏览器中都能正确显示。
<!DOCTYPE html>
<html lang="en">

<head>
    <meta charset="UTF-8">
    <meta http-equiv="X-UA-Compatible" content="IE=edge">
    <meta name="viewport" content="width=device-width, initial-scale=1.0">
    <title>Document</title>
    <style>
        /* 浏览器默认是微软雅黑 */
        div {
            /* 微软雅黑 */
            font-family: "Arail";
        }
        p {
            /* Times new Roman */
            font-family: "Time new Roman","宋体";
            font-size: 30px;
        }
    </style>
</head>

<body>
    <div>冯荣旭</div>
    <div>Hello</div>
    <p>Hello,EveryOne,大家好</p>
</body>

</html>
2
3
4
5
6
7
8
9
10
11
12
13
14
15
16
17
18
19
20
21
22
23
24
25
26
27
28
29
- 结果
# font-weight:字体粗细
字体加粗除了用 b 和 strong 标签之外,可以使用css 来实现。
font-weight属性用于定义字体的粗细,其可用属性值:normal、bold、bolder、lighter、100~900(100的整数倍)。
| 属性值 | 描述 |
|---|---|
| normal | 默认值。定义标准的字符。 |
| bold | 定义粗体字符。 |
| bolder | 定义更粗的字符。 |
| lighter | 定义更细的字符。 |
| 100~900 | 定义由粗到细的字符。400 等同于 normal,而 700 等同于 bold。 |
数字 400 等价于 normal,而 700 等价于 bold。 但是我们更喜欢用数字来表示。
<!DOCTYPE html>
<html lang="en">
<head>
    <meta charset="UTF-8">
    <meta http-equiv="X-UA-Compatible" content="IE=edge">
    <meta name="viewport" content="width=device-width, initial-scale=1.0">
    <title>Document</title>
    <style>
        p{
            font-size: 30px;
            /* 字体加粗 */
            /* font-weight: bold; */
            /* font-weight: bolder; */
            /* font-weight: lighter; */
            /* 正常体 */
            font-weight: 400;
            /* 正常体 */
            font-weight: normal;
            /* 加粗 */
            font-weight: 700;

            /* 总结:数字400正常体。700加粗 */
        }
    </style>
</head>
<body>
    <p>英雄联盟</p>
    <p>亚索</p>
</body>
</html>
2
3
4
5
6
7
8
9
10
11
12
13
14
15
16
17
18
19
20
21
22
23
24
25
26
27
28
29
30
- 结果
# font-style:字体风格
字体倾斜除了用 i 和 em 标签之外,可以使用css 来实现,但是css 是没有语义的。
font-style属性用于定义字体风格,如设置斜体、倾斜或正常字体,其可用属性值如下:
normal:默认值,浏览器会显示标准的字体样式。
italic:浏览器会显示斜体的字体样式。
oblique:浏览器会显示倾斜的字体样式。
注意:平时我们很少给文字加斜体,反而喜欢给斜体标签(em,i)改为普通模式。
<!DOCTYPE html>
<html lang="en">
<head>
    <meta charset="UTF-8">
    <meta http-equiv="X-UA-Compatible" content="IE=edge">
    <meta name="viewport" content="width=device-width, initial-scale=1.0">
    <title>Document</title>
    <style>
        i{
            font-style: normal;
        }
        span{
            /* 斜体 */
            font-style: italic;
            /* 设置倾斜 */
            font-style: oblique;
        }
        /* 总结:字体可以变为倾斜,也可以从斜体变为正常 */
    </style>
</head>
<body>
    <i>斜体</i>
    <em>斜体</em>
    <span>英雄联盟</span>
</body>
</html>
2
3
4
5
6
7
8
9
10
11
12
13
14
15
16
17
18
19
20
21
22
23
24
25
26
- 结果

# font:综合设置字体样式 (重点)
font属性用于对字体样式进行综合设置,其基本语法格式如下:
选择器{
    font: font-style  font-weight  font-size  font-family;
}
2
3
注意
1.使用font属性时,必须按上面语法格式中的顺序书写,不能更换顺序,各个属性以空格隔开。
2.其中不需要设置的属性可以省略(取默认值),但必须保留font-size和font-family属性,否则font属性将不起作用。
# 开发者工具(chrome)
此工具是我们的必备工具,以后代码出了问题,我们首先就是:
“按F12”或者是 “shift+ctrl+i” 打开开发者工具。
- ctrl+滚轮可以放大开发者工具代码大小。
- 左边是HTML元素结构 右边是CSS样式。
- 右边CSS样式可以改动数值和颜色查看更改后效果。
# CSS注释
CSS规则是使用 /* 需要注释的内容 */ 进行注释的。
p{
  font-size: 14px;                 /* 所有的字体是14像素大小*/
  }
2
3
# 选择器
# 基本选择器(重点)
# 标签选择器
p {
    font-size: 16px;
    color: red;
}
2
3
4
选择页面中所有的
<p>元素,给它们设置字体大小和颜色。
# Class 选择器
.box {
    font-size: 20px;
    color: green;
}
2
3
4
5
选择页面中 class 属性值中包含 box 类名的所有元素,给它们设置字体大小和颜色。
# ID 选择器
#nav {
    font-size: 24px;
    color: blue;
}
2
3
4
5
选择页面中 id 属性值是 nav 的元素,给它设置字体大小和颜色。
id选择器和类选择器区别
W3C标准规定,在同一个页面内,不允许有相同名字的id对象出现,但是允许相同名字的class。 类选择器(class) 好比人的名字, 是可以多次重复使用的。 id选择器 好比人的身份证号码, 全中国是唯一的, 不得重复。 只能使用一次。
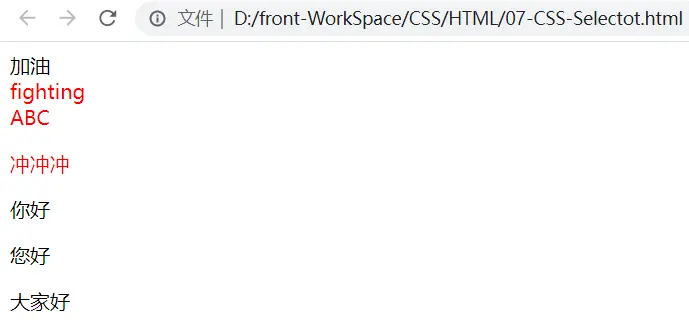
# 通配符选择器
* {
    font-size: 24px;
    color: blue;
}
2
3
4
<!DOCTYPE html>
<html lang="en">
<head>
    <meta charset="UTF-8">
    <meta http-equiv="X-UA-Compatible" content="IE=edge">
    <meta name="viewport" content="width=device-width, initial-scale=1.0">
    <title>Document</title>
    <style>
        /* 标签选择器 */
        /* div {
            color:blue;
        } */
        /* class选择器 */
        .goto{
            color:red;
        }

        .pp{
            color:red;
        }
        /* id选择器 */
        /* 相同名字的id选择器只能有一个 */
        #abc{
            color: red;
        }

        /* 总结:
        相同名字的id选择器只能有一个
        同样名字的class属性可以重复 */
    </style>
</head>
<body>
    <div>加油</div>
    <div class="goto">fighting</div>
    <div id="abc">ABC</div>
    <p class="pp">冲冲冲</p>
    <div>你好</div>
    <p>您好</p>
    <span>大家好</span>
</body>
</html>
2
3
4
5
6
7
8
9
10
11
12
13
14
15
16
17
18
19
20
21
22
23
24
25
26
27
28
29
30
31
32
33
34
35
36
37
38
39
40
41
- 结果
# 总结-CSS的基本选择器
- 标签选择器:针对一类标签
- ID选择器:针对某一个特定的标签使用
- 类选择器:针对你想要的所有标签使用
- 通用选择器(通配符):针对所有的标签都适用(不建议使用)
# 伪类选择器(重点)
伪类选择器用于向某些选择器添加特殊的效果,比如给链接添加特殊效果等。
为了和我们刚才学的类选择器相区别,类选择器是一个点比如 .demo {} 而我们的伪类选择器用 2个点 就是冒号比如 :link{}
# 链接伪类选择器
/* 未访问的链接 */
:link
 /* 已访问的链接 */
:visited
/* 鼠标移动到链接上 */
:hover
/* 选定的链接 */
:active
2
3
4
5
6
7
8
9
提示:
在 CSS 定义中,a:hover 必须位于 a:link 和 a:visited 之后,这样才能生效!
a:active 必须位于 a:hover 之后,这样才能生效!
注意:
a:link会对拥有a标签的属性href="",即拥有实际链接地址的a对象发生效果
<!DOCTYPE html>
<html lang="en">
<head>
    <meta charset="UTF-8">
    <meta http-equiv="X-UA-Compatible" content="IE=edge">
    <meta name="viewport" content="width=device-width, initial-scale=1.0">
    <title>Document</title>
    <style>
        /* 未访问的链接 */
        a:link{
            color: yellow;
        }

        /* 已访问的链接 */
        a:visited{
            color:aqua;
        }
        /* 鼠标放上去 */
        a:hover{
         color: darkmagenta;
        }
        /* 鼠标点着不放 */
        a:active{
            color:blue;
        }


    </style>
</head>
<body>
    <a href="#">百度</a>
    <a href="https://www.baidu.com"></a>
    <div class="box">div元素</div>
    <!-- 注意点:
    在 CSS 定义中,a:hover 必须位于 a:link 和 a:visited 之后,这样才能生效!
    a:active 必须位于 a:hover 之后,这样才能生效! -->
</body>
</html>
2
3
4
5
6
7
8
9
10
11
12
13
14
15
16
17
18
19
20
21
22
23
24
25
26
27
28
29
30
31
32
33
34
35
36
37
38
- 结果

# CSS外观属性
# color:文本颜色
| 属性名 | color |
|---|---|
| 属性值 | 预定义的颜色名 | 十六进制值的颜色值 | RGB颜色值 |
| 默认值 | 在不同浏览器中,默认值可能不同,但是在大部分浏览器中默认值为黑色。 |
| 描述 | 设置文本的颜色 |
注意:
1.一般情况下颜色我们喜欢小写字母 比如 #ff0000。
2.css颜色简写比如 #ff0000 可以简写为#f00, #ff00ff 简写为 #f0f。
# 颜色半透明(css3)
文字颜色到了CSS3我们可以采取半透明的格式了语法格式如下:
/* a 是alpha透明的意思,取值范围 0~1之间  */
color: rgba(r,g,b,a)
color: rgba(0,0,0,0.3)
2
3
<!DOCTYPE html>
<html lang="en">
<head>
    <meta charset="UTF-8">
    <meta http-equiv="X-UA-Compatible" content="IE=edge">
    <meta name="viewport" content="width=device-width, initial-scale=1.0">
    <title>Document</title>
    <style>
        .con{
            color: red;
        }
        .main{
            color: #000;
            color: #fff;
        }
        .warp{
            color:#ff0000;
            color: rgb(100, 200, 200);
            color: rgb(0, 0, 0);
        }
        .al{

            color:rgba(100,200,200,0.5)
        }
    </style>
</head>
<body>
    <div class="con">2013年,习近平总书记提出了共建“一带一路”重大倡议,如今,高质量共建“一带一路”,不仅为各国开拓出一条通向共同繁荣的机遇之路。</div>
    <div class="main">越来越多不沿边不靠海的内陆省份,正在从开放末梢转身开放最前沿。</div>
    <div class="warp">在西安国际港站,8台龙门吊正在同时吊装来自世界各地的集装箱。每天,从这里出发和抵达的中欧班列“长安号”有十余列,联通省内外20多座城市和45个“一带一路”沿线国家和地区。</div>
    <div class="al">西安国际港站值班站长 李沛:你看这个箱子是从德国来的,现在的国际港,你看货场上现在这么多集装箱,五花八门,五颜六色,是从全世界各地来国际港的。</div>
</body>
</html>
2
3
4
5
6
7
8
9
10
11
12
13
14
15
16
17
18
19
20
21
22
23
24
25
26
27
28
29
30
31
32
33
- 结果

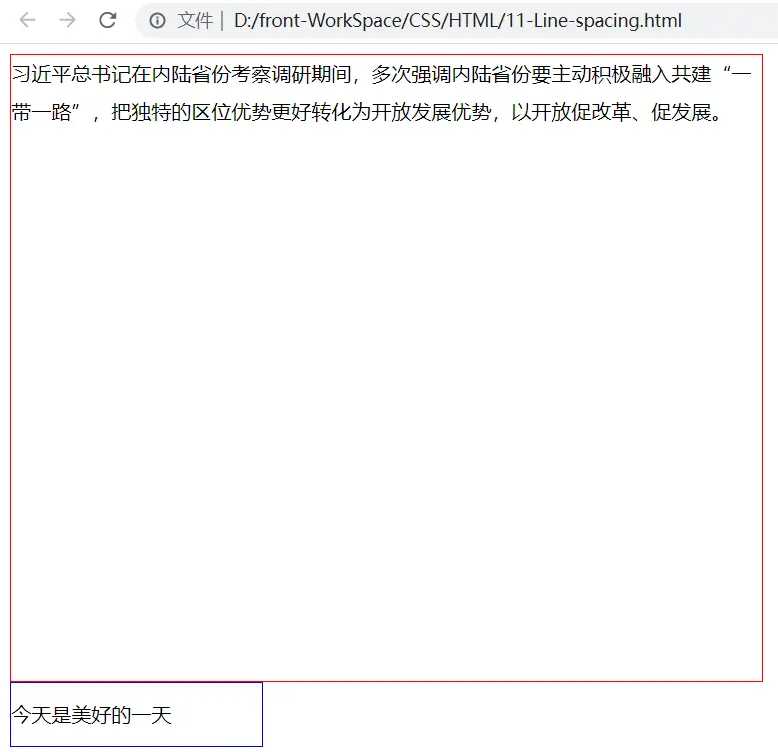
# line-height:行间距
行高是指文本行基线间的垂直距离:基线与基线之间的距离。
| 属性名 | line-height |
|---|---|
| 属性值 | normal |数字 | 长度值 | 百分比 |
| 默认值 | normal |
| 描述 | 设置文本的行高 |
- normal:默认值,行高由浏览器自动处理。
- 数字:行高 = 数字 * 字体大小,例如,
line-height: 2;font-size: 16px;,则行高等于:2 * 16px = 32px - 长度值:使用长度值设置行高,例如,
line-height: 32px。

基线(base line)并不是汉字文字的下端沿,而是英文字母“x”的下端沿。
一般项目中的页面的行高设置比字号大7~8像素左右就可以了, 比如当前使用14像素的字号,行高设为24像素左右合适。
<!DOCTYPE html>
<html lang="en">
<head>
    <meta charset="UTF-8">
    <meta http-equiv="X-UA-Compatible" content="IE=edge">
    <meta name="viewport" content="width=device-width, initial-scale=1.0">
    <title>Document</title>
    <style>
        div {
            width: 600px;
            height: 500px;
            /* 边框 */
            border: 1px solid red;
            /* 行高,行间距 */
            line-height: 30px;
        }
        .box {
            width: 200px;
            height: 50px;
            border: 1px solid blue;
            /* 设置盒子一样的高度,文本会垂直居中 */
            line-height: 50px;
        }
    </style>
</head>
<body>
    <div>习近平总书记在内陆省份考察调研期间,多次强调内陆省份要主动积极融入共建“一带一路”,把独特的区位优势更好转化为开放发展优势,以开放促改革、促发展。</div>
    <div class="box">今天是美好的一天</div>
</body>
</html>
2
3
4
5
6
7
8
9
10
11
12
13
14
15
16
17
18
19
20
21
22
23
24
25
26
27
28
29
30
- css
<!DOCTYPE html>
<html lang="en">
<head>
    <meta charset="UTF-8">
    <meta http-equiv="X-UA-Compatible" content="IE=edge">
    <meta name="viewport" content="width=device-width, initial-scale=1.0">
    <title>Document</title>
    <style>
        div {
            width: 600px;
            height: 500px;
            /* 边框 */
            border: 1px solid red;
            /* 行高,行间距 */
            line-height: 30px;
        }
        .box {
            width: 200px;
            height: 50px;
            border: 1px solid blue;
            /* 设置盒子一样的高度,文本会垂直居中 */
            line-height: 50px;
        }
    </style>
</head>
<body>
    <div>习近平总书记在内陆省份考察调研期间,多次强调内陆省份要主动积极融入共建“一带一路”,把独特的区位优势更好转化为开放发展优势,以开放促改革、促发展。</div>
    <div class="box">今天是美好的一天</div>
</body>
</html>
2
3
4
5
6
7
8
9
10
11
12
13
14
15
16
17
18
19
20
21
22
23
24
25
26
27
28
29
30
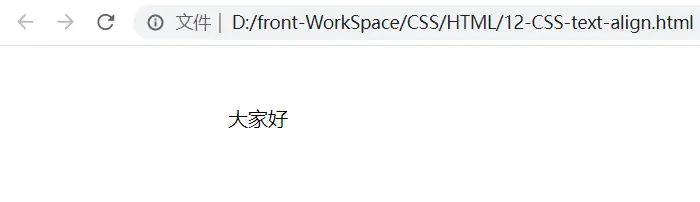
# text-align:水平对齐方式
| 属性名 | text-align |
|---|---|
| 属性值 | left | right | center | justify |
| 默认值 | 如果文本方向为ltr,则默认值为left;如果文本方向为rtl,则默认值为right |
| 描述 | 设置文本在水平方向上的对齐方式 |
- **left:**内容左对齐。
- **center:**内容居中对齐。(重点)
- **right:**内容右对齐。
- **justify:**内容两端对齐,但对于强制打断的行(被打断的这一行)及最后一行(包括仅有一行文本的情况,因为它既是第一行也是最后一行)不做处理。
<!DOCTYPE html>
<html lang="en">
<head>
    <meta charset="UTF-8">
    <meta http-equiv="X-UA-Compatible" content="IE=edge">
    <meta name="viewport" content="width=device-width, initial-scale=1.0">
    <title>Document</title>
    <style>
        .box {
            width: 400px;
            height: 100px;
            /* 水平对齐方式:
            左对齐 默认
            text-align: left;
            右对齐
            text-align: right;
            居中对齐
            text-align: center;
            */
            text-align: center;
            line-height: 100px;

        }
    </style>
</head>
<body>
    <div class="box">大家好</div>
</body>

</html>
2
3
4
5
6
7
8
9
10
11
12
13
14
15
16
17
18
19
20
21
22
23
24
25
26
27
28
29
30
- 结果
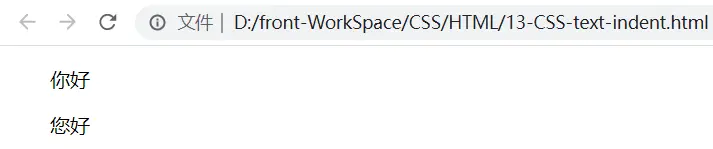
# text-indent:首行缩进
text-indent属性用于设置首行文本的缩进,其属性值可为不同单位的数值、em字符宽度的倍数、或相对于浏览器窗口宽度的百分比%,允许使用负值, 建议使用em作为设置单位。
<!DOCTYPE html>
<html lang="en">
<head>
    <meta charset="UTF-8">
    <meta http-equiv="X-UA-Compatible" content="IE=edge">
    <meta name="viewport" content="width=device-width, initial-scale=1.0">
    <title>Document</title>
    <style>
        p {
            /* 首行缩进 */
            text-indent: 2em;
        }
    </style>
</head>
<body>
    <p>
        你好
    </p>
    <p>
        您好
    </p>
</body>
</html>
2
3
4
5
6
7
8
9
10
11
12
13
14
15
16
17
18
19
20
21
22
23
- 结果
# text-decoration:文本修饰
文本修饰
| 属性名 | text-decoration |
|---|---|
| 属性值 | none | underline | overline | line-through |
| 默认值 | none |
| 描述 | 对文本进行修饰 |
- **none:**指定文字无装饰
- **underline:**指定文字的装饰是下划线
- **overline:**指定文字的装饰是上划线
- **line-through:**指定文字的装饰是贯穿线
<!DOCTYPE html>
<html lang="en">
<head>
    <meta charset="UTF-8">
    <meta http-equiv="X-UA-Compatible" content="IE=edge">
    <meta name="viewport" content="width=device-width, initial-scale=1.0">
    <title>Document</title>
    <style>
        a {
            /* 不要文本修饰 */
            text-decoration: none;
        }
        div {
            /* 下划线 */
            text-decoration: underline;
            /* 上划线 */
            text-decoration: overline;
            /* 删除线 */
            text-decoration: line-through;
        }

    </style>
</head>
<body>
    <a href="">中秋节</a>
    <div>吃月饼</div>
</body>
</html>
2
3
4
5
6
7
8
9
10
11
12
13
14
15
16
17
18
19
20
21
22
23
24
25
26
27
28
- 结果

# letter-spacing:字符间距
字符间距
| 属性名 | letter-spacing |
|---|---|
| 属性值 | normal | 长度值 |
| 默认值 | normal |
| 描述 | 增加或减少字符间的空白(字符间距) |
- **normal:**默认间隔
- **长度值:**用长度值指定间隔。可以为负值。
# word-spacing(单词)
单词间距
| 属性名 | word-spacing |
|---|---|
| 属性值 | normal | length |
| 默认值 | normal |
| 描述 | 增加或减少单词间的空白(即字间隔) |
- **normal:**默认间隔
- **length:**用长度值指定间隔。可以为负值。
<!DOCTYPE html>
<html lang="en">
<head>
    <meta charset="UTF-8">
    <meta http-equiv="X-UA-Compatible" content="IE=edge">
    <meta name="viewport" content="width=device-width, initial-scale=1.0">
    <title>Document</title>
    <style>
        h2 {
            /* 字符间距(中英文,字母都起作用) */
            /* letter-spacing: 30px; */

            /* 空格会认定为一个单词 */
            word-spacing: 30px;
        }

        div {
            word-spacing: 30px;
        }

        p {
            letter-spacing: 30px;
        }
    </style>
</head>
<body>
    <h2>关于我们 about us</h2>
    <div>Hello,Nice to meet you</div>
    <p>大家好</p>
</body>
</html>
2
3
4
5
6
7
8
9
10
11
12
13
14
15
16
17
18
19
20
21
22
23
24
25
26
27
28
29
30
31
- 结果

# 文字阴影(CSS3)
可以给文字添加阴影效果
text-shadow:水平位置 垂直位置 模糊距离 阴影颜色;
| 值 | 描述 |
|---|---|
| h-shadow | 必需。水平阴影的位置。允许负值。 |
| v-shadow | 必需。垂直阴影的位置。允许负值。 |
| blur | 可选。模糊的距离。 |
| color | 可选。阴影的颜色。 |
- 前两项是必须写的。 后两项可以选写。
/* 多重阴影 */
text-shadow: -5px 0px cyan, 5px 0px red;
2
<!DOCTYPE html>
<html lang="en">
<head>
    <meta charset="UTF-8">
    <meta http-equiv="X-UA-Compatible" content="IE=edge">
    <meta name="viewport" content="width=device-width, initial-scale=1.0">
    <title>Document</title>
    <style>
        .con {
            font-size: 30px;

            /* 水平距离,垂直距离,模糊距离,阴影的颜色 */
            /* 正值向右移动,赋值向左移动 */
            text-shadow: 10px 5px 0px red;
        }
    </style>
</head>
<body>
    <div class="con">你好</div>
</body>
</html>
2
3
4
5
6
7
8
9
10
11
12
13
14
15
16
17
18
19
20
21
- 结果

# CSS书写规范
开始就形成良好的书写规范,是你专业化的开始。
# 标识符规范
【建议】小写。
示例:
/* good */
.username{
   color:red;
}

/* bad */
.USERNAME{
   COLOR:RED;
}
2
3
4
5
6
7
8
9
10
# 属性规范
【强制】 属性定义必须另起一行。
示例:
/* good */
.selector{
    margin: 0;
    padding: 0;
}

/* bad */
.selector { margin: 0; padding: 0; }
2
3
4
5
6
7
8
9
【强制】 属性定义后必须以分号结尾。
示例:
/* good */
.selector {
    margin: 0;
}

/* bad */
.selector {
    margin: 0
}
2
3
4
5
6
7
8
9